Create calendar link code from addtocalendar.com by scrolling down to the “Use the Add to Calendar link in an email campaign” heading and click on the “Just fill in the form” button.

This will reveal a form where you can enter the details for the new event.
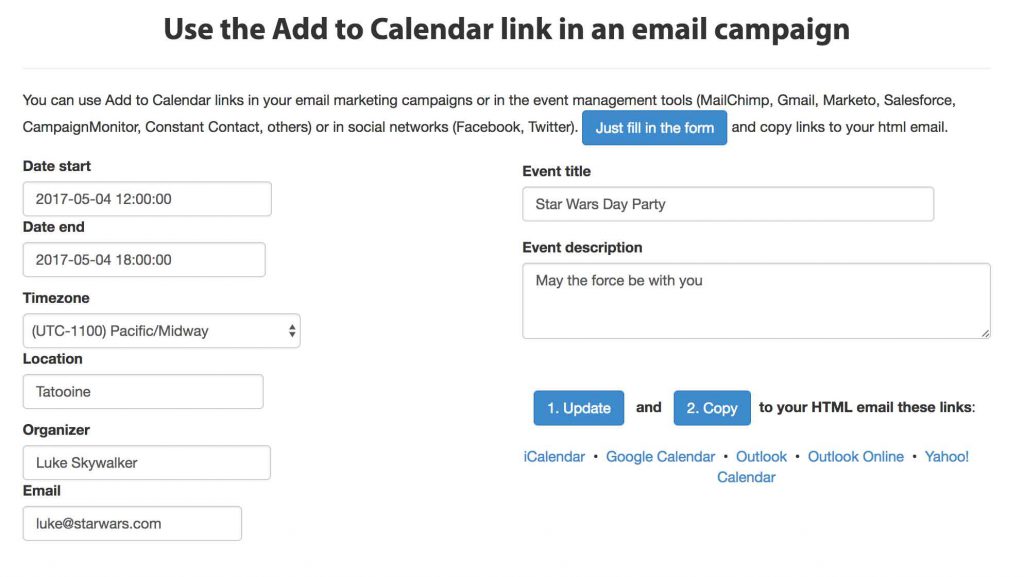
After the details for the new event are in place, click on the Update button followed by the Copy button. The code will be on your clipboard and available for the next step.

Create Form
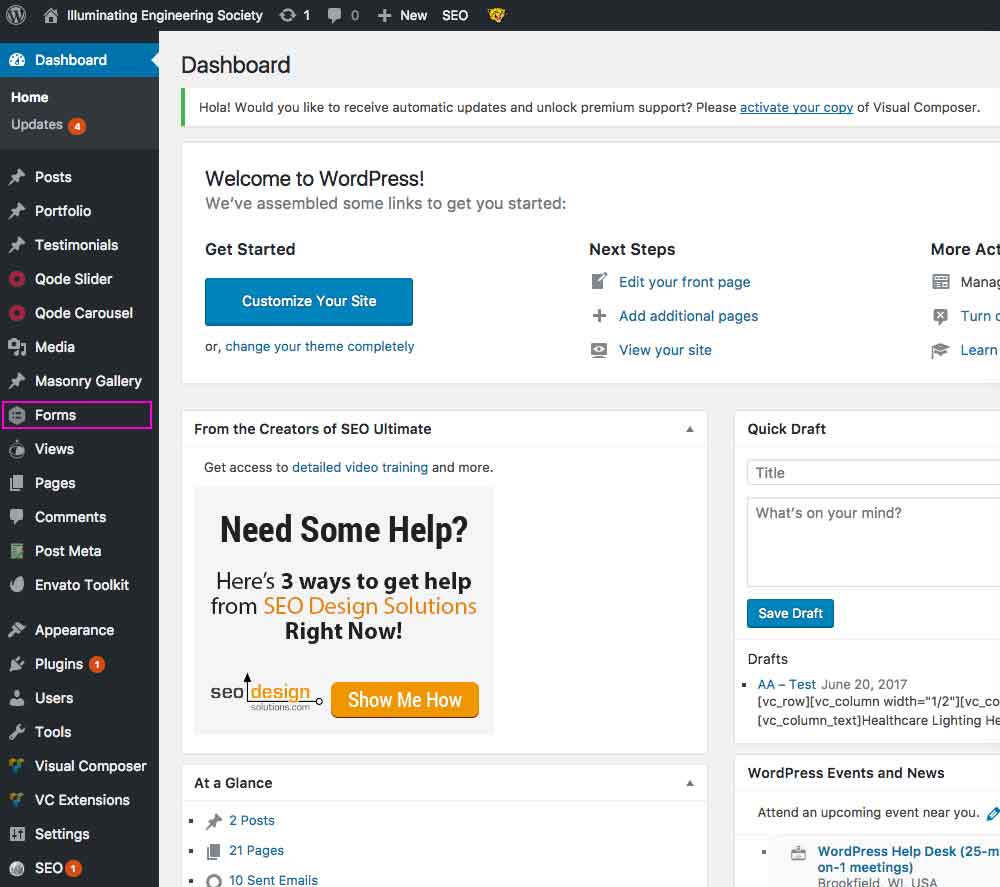
To create a new form, log into the IES WordPress Backend, select “Forms” from the menu (on the left), and select “forms” from the submenu.
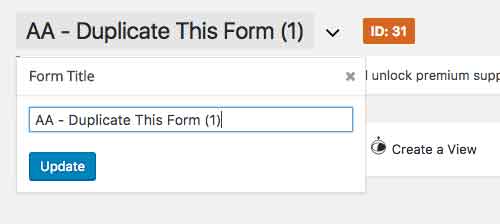
In the list of forms, there is one named “AA – Duplicate This Form” that we will use as a template. Hover over it and select “Duplicate” from the options that appear.

Select the new form to edit.

At the top of the page, click on the name of the form to rename. A menu will appear with a text box.
Next, we will need to insert the Add to Calendar code that is on the clipboard to the new form’s Confirmation (web page) and Notification (email) messages.
Hover over “Settings” and select “Confirmations.”
Then Select “Default Confirmation.”
In the message Replace the lower portion of the message by deleting it and pasting in the “addtocalendar” code from the clipboard.

Click the “Save Confirmation” button after pasting in the code.
Then do the same or the Notification message by selecting “Notifications” and editing the “Registrant” notification.

After pasting the code, click “Update Notification.
Create View
Click on “Views” from the WordPress menu.

Hover over the template view “AA-Clone This View” and select “Clone” from the options that appear.

Rename the “View.”
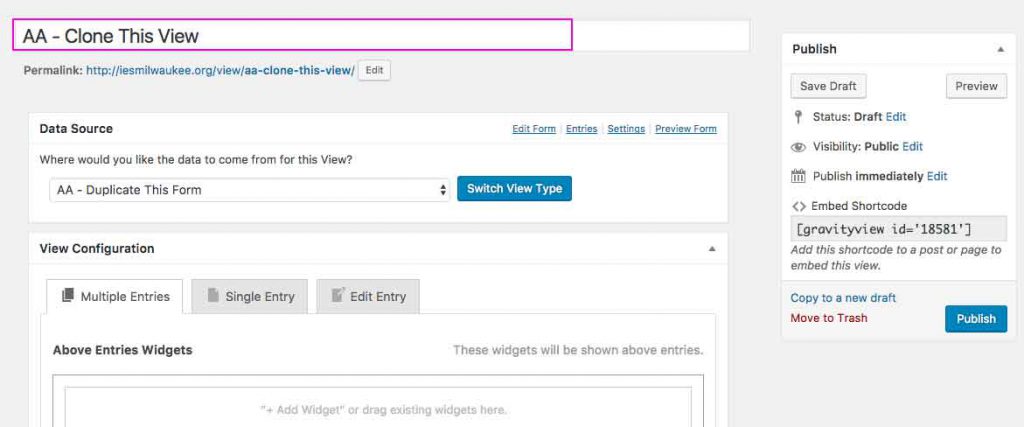
Select the new form that was just created that corresponds to this view.

Verify that the proper fields are listed by clicking on the gear next to “Custom Content.”


Copy the Shortcode that is shown in the publish window.
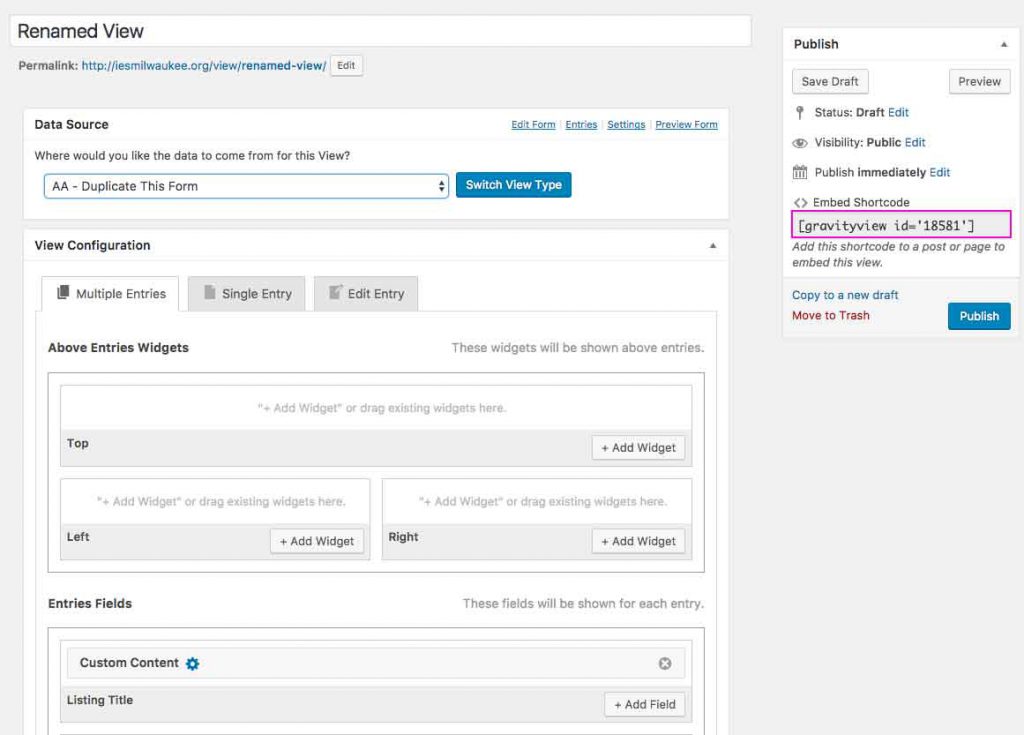
Click “Publish” below the Shortcode.
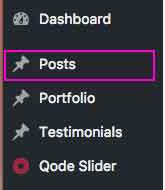
Create Post
Select “Posts” from the WordPress menu.
Clone the “AA-Template” post.
Rename this post using the text box at the top of the page. Hit enter afterward and the Permalink should update to the new name as well.
Replace the shortcode under “Attendees:” with the one that is on the clipboard from the corresponding view. Hover over the element and select the edit icon (pencil).

Select the “Text” tab.
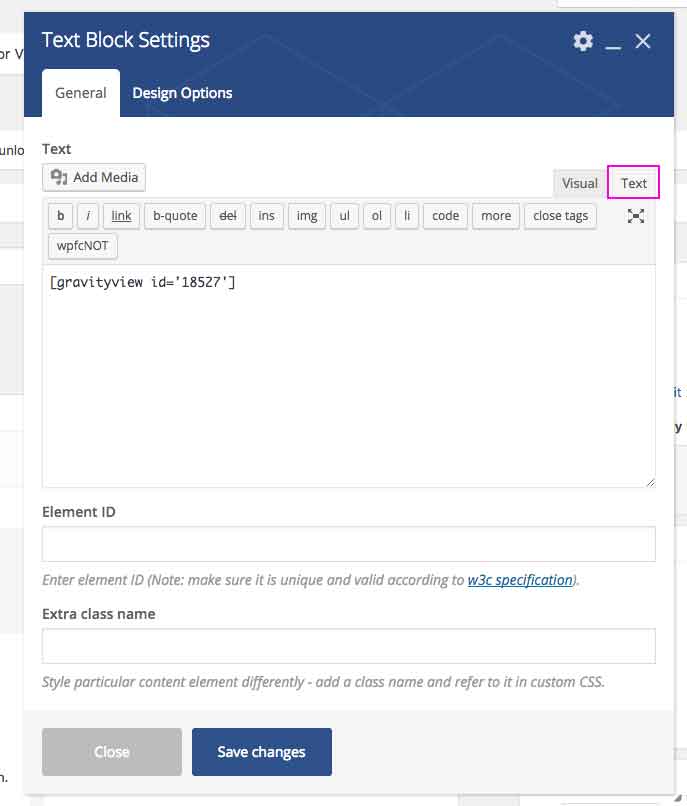
Replace the template’s Shortcode by pasting the Shortcode that is on the Clipboard from the corresponding view.
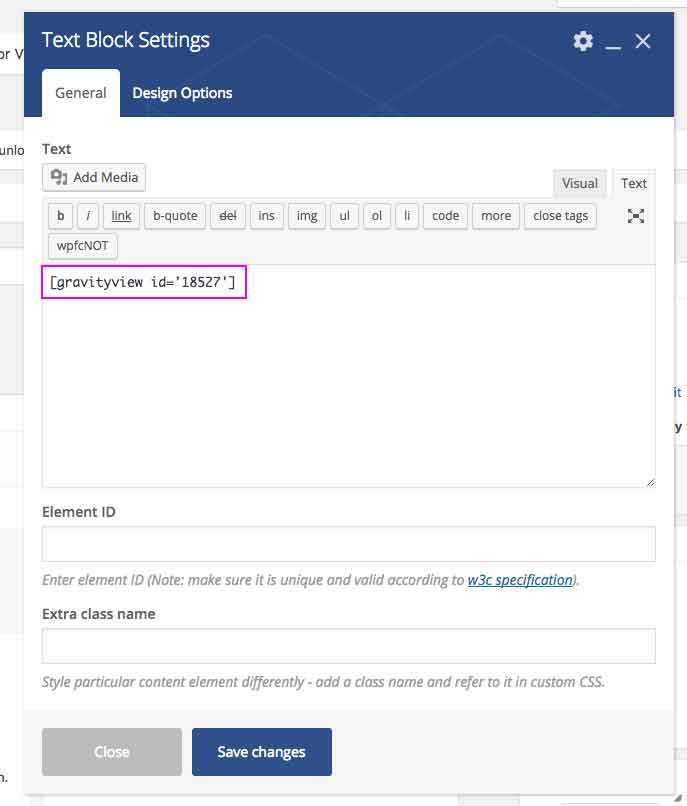
Then click on “Save changes” followed by “Publish.”